
Putting in van flooring is an important step to your DIY conversion. Virtually every thing you add to your rig after becoming the ground will probably be screwed to it, so it higher be sturdy and watertight. Having an excellent, stable, well-insulated and comfy ground in your house on wheels is crucial if you wish to hit the street usually.
Sara and Philip from Meander Explorers advocate taking your time to decide on and set up van flooring as a result of it’s not simple to interchange, particularly in the event you go for gluing the highest layer onto the subfloor. That is the case of sheet vinyl, cork tiles and different supplies.
However earlier than we take a look at the enjoyable flooring choices you’ll be able to select from and the right way to match them, we should always discuss what goes beneath it, which is much more vital.
do you want to insulate van ground?
Completely! Flooring insulation is prime to conserving your van cozy. It would forestall warmth and chilly from touring by means of the undercarriage into the cabin. Flooring insulation may even assist you to construct an energy-efficient camper van since you received’t lose any warmth from a heater or cool air from an AC unit. Lastly, insulation will assist cut back street noise contained in the car.
So you must positively insulate your camper van ground. Little doubt.
How do you insulate a van ground?
To insulate a van ground you’ll want to stay insulation sheets to the steel ground, lay wood beams for help, match insulation boards between the stips, and fix a plywood subfloor to the construction.
Insulating van flooring takes a couple of day of labor. When you’ve by no means carried out it earlier than you’ll most likely make some errors and also you may must recut some items of wooden, ply or foam boards alongside the way in which. It’s all a part of the enjoyable of DIY-ing.
Let’s take a look at the right way to insulate a van ground, step-by-step.
For this undertaking you have to:
- A ground cleaner
- A great high quality rust remover
- Insulation, resembling Reflectix or Thinsulate
- Aluminum tape
- Wood furring beams that match the peak of the insulation
- A glue, like Sickaflex
- Foam board insulation, like XPS or polyiso board, or different insulation of your selection
- Plywood sheets
- Screws
- Drill
- Instruments to take away the prevailing flooring, like paint scrapers and screwdrivers
- Round noticed or hand noticed
- Heavy objects like bricks.
You need to use this video the place Greg Virgoe exhibiting the precise method for the Sprinter van flooring set up.
Now let’s undergo this set up course of step-by-step.
1) Take away the manufacturing unit ground
First, you want to take away the prevailing ground. That is often made out of wooden composite, which has numerous flex. When you begin putting in furnishings in your car, it is going to probably bow or create bubbles. So simply strip it out with none worries. Don’t throw it away although; you should use it as a template to your flooring.
2) Clear the steel ground
Earlier than you do something, give the steel ground a superb scrub. If there’s any rust, deal with any spots with a superb high quality rust elimination therapy. If there are any holes, fill them with sealant and aluminum tape.
3) Measure the world and create a structure
At this stage, it’s vital you are taking correct measurements of the van’s ground and draw a plan for it. This may provide help to determine the place to put the supplies you want for the undertaking and the way a lot to purchase of every.
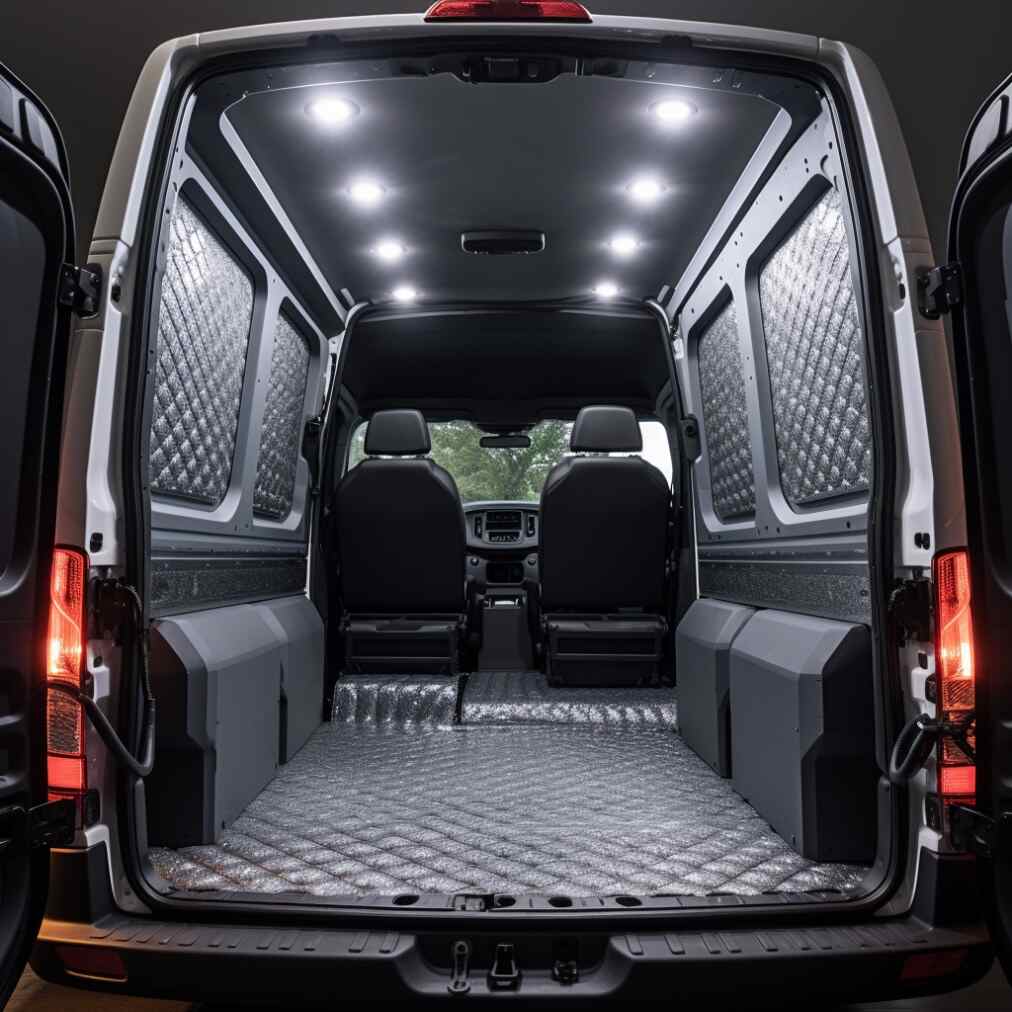
4) Lay strips of insulation
Subsequent you wish to shut all of the air pockets created by the troughs and ridges within the steel ground of most vans. Lay strips of an insulation sheet, like Reflectix, on the ground to cowl all of the troughs. Use foil tape on the ridges to create a seal. At this stage, ensure you additionally cowl the wheel-wells with the insulation strips and tape them down on the edges.
5) Match wood furring beams
When you’ve sealed all of the air gaps, you’re prepared to put in the wood furring strips. The peak of those must match that of the insulation materials you’ll use afterward.
When you can, determine the place to put the beams primarily based in your ground plan. It is because you have to to screw the furnishings, in addition to the floorboards, into the strips. Minimize the beams to measurement utilizing a round noticed, in order that they match completely within the van. To make your life simpler, you’ll be able to label them so that you received’t want to recollect the place they go.
Lay the beams horizontally and vertically on the ground. Use as many items of wooden as you’ll be able to, particularly in the event you’re not making an attempt to match your ground plan, so you’ll be able to set up the flooring and furnishings sturdily.
When you’re proud of the place of the beams, stick them to the ground utilizing a glue, like Sickaflex. Keep away from screwing the wooden into the steel ground, as it is going to probably result in water infiltration, mould and rust.
You possibly can place heavy objects, like bricks, over the beams to assist them keep on with the ground. You are able to do this at this stage, in the event you plan to take a break from the undertaking, or wait till the subfloor is in place.
6) Set up foam board insulation
Subsequent, you’re prepared to suit the froth board insulation (or every other sort of insulation you’ve chosen). Minimize the boards to suit the areas between the beams. You need to use a handsaw for this. Don’t neglect to put on a masks otherwise you’ll inhale numerous foam mud. Match the boards within the cavities – there’s no want to repair them in place.
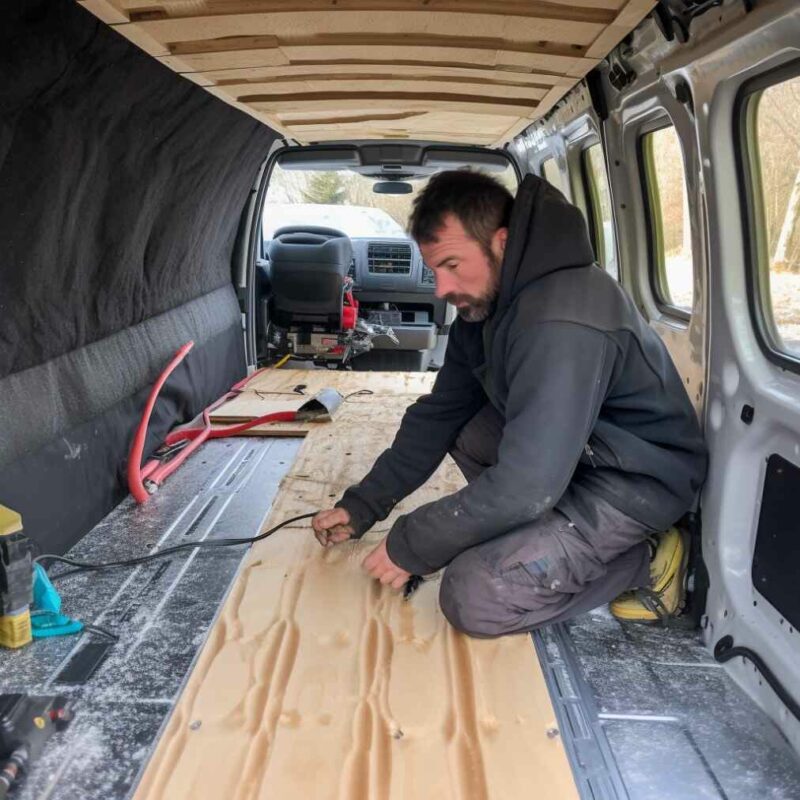
7) Match a plywood subfloor
Lastly, you’re prepared so as to add a plywood subfloor. This may present an excellent, stable floor on which to put in the flooring materials. Minimize the ply sheets to measurement utilizing the previous ground as a template, in order that they cowl the ground space. Place them over the wood furring beams and screw them into it.
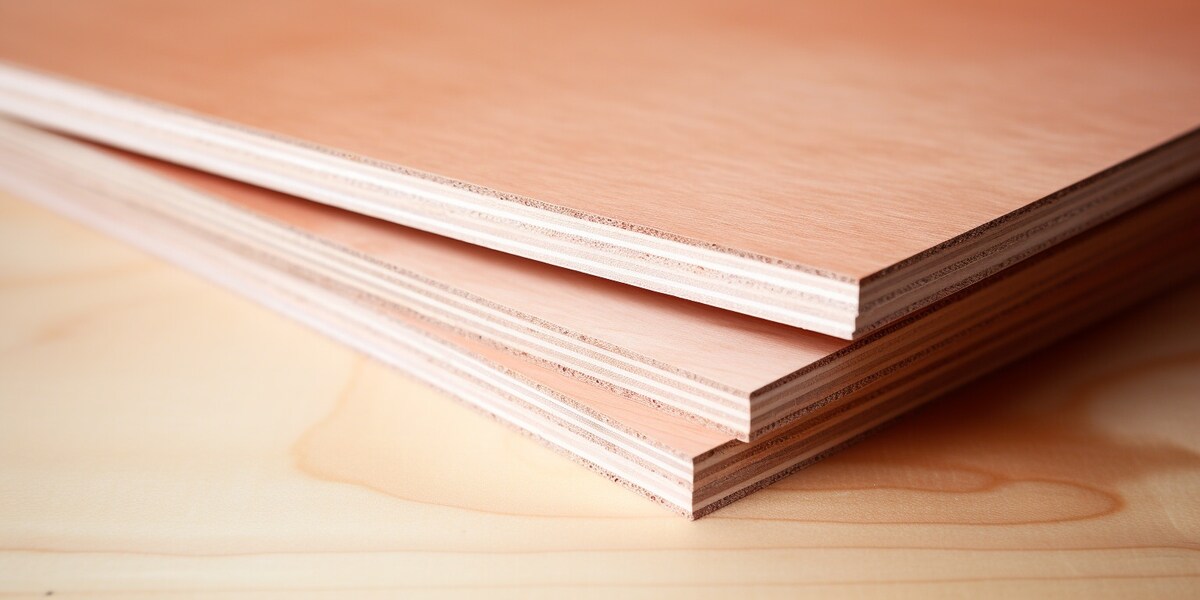
What thickness plywood for camper van ground ought to I exploit?
3/4 inch (18mm) 5-ply plywood is a generally really helpful thickness for van flooring. This thickness supplies a sturdy base to your flooring, supporting the burden of furnishings and occupants whereas sustaining sturdiness.
There’s no must go any thicker than 3/4 – it is going to simply add weight to your rig.
the right way to match false ground in van
Earlier than we transfer onto the completed ground choices, take into consideration whether or not you’d like to put in a false ground. A false ground will be tremendous useful if you wish to add a hidden storage resolution to your camper van. It permits you to retailer gadgets like tenting chairs, instruments and snow chains out of view.
A false ground doesn’t need to take a lot headroom and you’ll place it in strategic areas – consider the storage, below a platform mattress, or the world in entrance of the sliding door.
Christie and Emily from This Pair Go There love their false ground as a result of it permits them to maintain their van neatly organized. They made their false ground extra inventive by including slide-out benches and a pull-out desk to it. The women say their cozy picnic space in the back of their van makes everybody jealous at boondocking spots.
The method of including a false ground is similar to the one we simply coated above. You’re principally making a second, increased subfloor. Besides, this one can have drawers popping out of it.
Right here’s the right way to construct a false ground:
- Create a structure that takes into consideration what kind of objects you wish to retailer within the false ground, how large an space it is going to cowl and the form of the drawers you wish to set up.
- Match supporting beams to help the false ground by screwing them into the wood furring beams under.
- Measure the areas between the beams and construct drawers that match into them. You need to use plywood sheets. To save lots of on house and complexity, don’t use drawer runners.
- Minimize some plywood sheets to measurement and screw them into the beams. Go away sufficient house on the outer facet so the drawer faces match contained in the van.
- When you like, cowl the false ground with the identical flooring materials you’ll use for the remainder of your van.
- Slide the drawers into their devoted holes.
An vital word: in the event you determine to put in a false ground don’t skip insulating the world beneath it. It is likely to be tempting to do it, however the lack of insulation in that space will have an effect on the temperature in the entire van.
What are the very best van flooring choices?
Now that you’ve got your subfloor and, probably, a false ground, you’re prepared to put your favourite flooring materials.
When selecting the fabric, keep in mind that you simply don’t want to put the identical ground throughout the entire car. For instance, you may select a handsome and comfortable materials for the dwelling space and a rubber mat for the storage, the place you’ll be storing muddy gear and heavy bins. This makes sensible sense and may even prevent some money.
Laminate
This must be the most well-liked possibility relating to van flooring. Laminate is reasonable, sturdy and powerful. Plus it is available in many various kinds and it’s offered in any DIY retailer. The one disadvantage to laminate is that it’s not waterproof and it’s liable to swelling because of moisture. So in the event you spill one thing on it you want to rush to wipe it off. And in the event you had a plumbing problem, you’d have to interchange an space of the ground. That’s not excellent, particularly in the event you journey full-time. Select a top quality laminate rated to be used in a toilet in the event you can.
Laminate is available in tongue and groove planks. These are simple to interlock for a floating set up, however you’ll want to chop those going across the edges of the van to measurement. That’s the toughest a part of the set up. It’s not rocket science, although, and in the event you stored the unique composite ground you should use it as a template.
Sharrieff Fareed, also referred to as DualEx on YouTube, is a van self-conversion specialist with numerous builds below his belt. He’s an enormous fan of laminate flooring as a result of it’s simple to put in, gentle and low-cost but it surely’s additionally sturdy. He recommends putting in the laminate earlier than you add any furnishings to your construct as a result of it means you received’t have so as to add skirting board onto the furnishings. Drilling the furnishings into the laminate ground may even strengthen it and maintain all of it collectively. Your van may even look extra skilled.
Sheet vinyl
One other van lifer favourite flooring selection is sheet vinyl. This materials is tremendous skinny, serving to you take advantage of the inside headroom in your van. One of these ground is waterproof, simple to scrub and appears good. Set up may be very simple: merely minimize the sheets to measurement and stick them to the ply subfloor. Good high quality sheet vinyl is comparatively sturdy, so that you shouldn’t fear about damaging it an excessive amount of; nevertheless, it may be a bit of heavy.
In our ebook, there are two disadvantages to sheet vinyl. It’s very tough to take away, because it’s caught to the subfloor, and repairing a small portion of it is extremely exhausting. When you select this feature to avoid wasting time in your flooring set up, cowl the sheet vinyl with rugs to guard them.
Kristen from Barefoot Theory used high-density vinyl flooring for the dwelling house of her second van (a 4×4 Mercedes Sprinter). It appears to be like nice, however the weave makes it exhausting to scrub. She recommends going for a clean texture that’s simple to brush and wipe.
Luxurious vinyl plank (LVP)
There are numerous advantages to LVP, which is why it’s being utilized in many houses today. It’s simple to put in, sturdy and straightforward to scrub. Not like laminate, it’s absolutely waterproof. It additionally appears to be like nicer than different flooring supplies, so it’s costlier.
You possibly can set up LVP as a floating ground, like laminate, or apply a peel-and-stick product to the planks so you’ll be able to stick them to the subfloor. A fast word of warning: eradicating LVP as soon as it’s hooked up to the subfloor may be very exhausting.
Cork flooring
Cork is an eco-friendly materials that’s surprisingly sturdy and feels good and comfortable underfoot. It additionally has sound-dampening and insulation properties, which is a large plus. On prime of all of it, cork is water, hearth, bug and mould resistant.
You possibly can both purchase cork sheets to attach to your subfloor or go for tongue and groove planks, which you’ll be able to interlock for a floating set up. As soon as the sheets or planks are in place, you’ll must seal them to maintain the ground in good situation.
The massive drawback of cork flooring is that it wants upkeep and it’s simple to scratch. You’ll need to reseal the tongue and groove each few years, which will be annoying. Cork additionally tends to be costly, however as a van ground is fairly small, it received’t break the financial institution.
Holly and Sam from YouTube channel Holly & Sam used cork tiles to create a comfortable van floor for his or her VW T6. They love the appear and feel of their ground, however are conscious that they should be cautious to not drop any sharp objects on it. Holly recommends laying not more than two to 4 tiles at a time and utilizing on the spot adhesive to attach the corners down.
Vinyl rubber flooring
Okay, rubber coin grip isn’t the best-looking materials on the market, but it surely’s extraordinarily sensible, robust and sturdy. It’s additionally absolutely waterproof. One of these flooring is right for a storage space just like the storage, the place you’ll be storing moist or muddy gadgets, like surf boards and mountain climbing boots.
Set up is tremendous simple: simply minimize the sheets to measurement and place them on prime of your subfloor. Job carried out. When you don’t screw any furnishings by means of the rubber you’ll be able to even take it out of the van to scrub it.
Hardwood
Some van lifers select the irresistible timeless look of hardwood flooring. It does look unbelievable, so we do perceive why. Keep in mind that wooden flooring can scratch simply, so that you’ll wish to set up it within the dwelling space solely and stroll round barefoot or in socks on it.
Earlier than you select hardwood, calculate how a lot the planks you’d want weigh. Actual wooden tends to weigh lots, so it’s greatest to decide on thinner planks.
When you plan to journey in humid climates, you may wish to keep away from hardwood, although. Wooden absorbs moisture, so it may well swell, warp or bow. This could create uneven flooring and even trigger issues opening cabinets and cupboards.
Methods to put a wooden ground in a van
Putting in a wood ground in your van isn’t exhausting, however will be time-consuming. First, glue the boards onto the subfloor with ground adhesive utilizing a glue gun. Be sure to unfold the adhesive evenly on the subfloor and on the planks utilizing a notch trowel earlier than you place the boards onto it. Press on the boards to assist them keep on with the ground and distribute the adhesive additional.
To suit the flooring to the sides of the van you’ll want to chop the boards to match the form of the perimeter of the car. Go away a small hole between the planks and the perimeters of the van to permit for growth.
Subsequent, you’ll must sand the ground down to lift the grain of the wooden. Lastly, coat the ground with a polyurethane end. If any of the gaps you left for the wooden growth are seen when you’ve laid your furnishings, disguise them becoming some skirting board.
Marcel from Salty Vanventures used this method to create his dream hardwood ground on a Ford Transit and he’s very happy with the outcome. He thinks the ground appears to be like lovely and he finds it holds up very well. He did discover the wooden scratches a bit of; nevertheless, you’ll be able to sand it down and apply the end earlier than there’s an excessive amount of injury.
Carpet
Lastly, you’ll be able to go for carpet. It’s fairly low-cost and may make your van really feel like house. Nonetheless, it traps numerous filth, mud and particles, so that you’ll want to hold a hoover in your van. Additionally, in the event you spill one thing on it, it’s very exhausting to scrub.
When you can’t hand over the concept of strolling barefoot on a carpet inside your camper van, we advocate getting an enormous rug. That method you’ll be able to shake it exterior to scrub it and exchange it if it will get broken.
To put in carpet, merely minimize the sheets into sections and staple them to the subfloor. Add steel transition strips on the edges. Et voila – you may have a snug, comfortable ground that creates a comfy really feel in your van.
As soon as your van flooring is put in, you’re prepared to begin including furnishings. Have you ever thought of becoming a DIY conversion package to avoid wasting time?
At Van2B, we manufacture high-quality DIY camper van conversion kits together with Mercedes Sprinter van conversion kits. There are additionally Transit van conversion kits and Promaster conversion kits.
We construct van life beds, kitchen, and van cabinets out of premium supplies from our workshop in San Diego, California. Assembling and putting in them solely takes 4 hours.
We ship without spending a dime to the Decrease 48.
Writer

The publish Blog appeared first on Van2b.
Trending Merchandise


